
![]()


Guest User Life Cycle Management Tool
Summary
This document is about managing Microsoft 365 Azure B2B Guest Users using a Azure DevOps YAML pipeline.
This document will give manual instructions on adding prerequisite assets (SharePoint and Flow) to your Microsoft Cloud environment which you can convert to scripted instructions and place in your forked (or another of your choosing) Configuration-as-Code repository.
The aim for this project is to present the structure for managing the life cycle of guests and to provide a working scheduled YAML pipeline. not to provide a production ready ‘working’ product.
Known Issues
None
Requirements
- Your own Azure DevOps organization, preferably linked to your Azure AD organization.
- If the PowerShell script
Scripts\M365\3. Governance\_GuestUserLifeCycleManagement\Apply-GuestUserLifeCycle.ps1needs to be run locally:- This script is fully cross-platform compatible using PowerShell 7+:
- Windows 7+ is supported (Windows 10 is recommended)
- Linux and MacOS are also supported
- PnP.PowerShell module needs to be installed
- Exchange Online PowerShell V2 module needs to be installed
- EasyGraph module needs to be installed
- This script is fully cross-platform compatible using PowerShell 7+:
- If you intend to use either the ‘PfxFile’ or ‘Thumb’ method for authenticating:
- Make sure you have previously executed the procedure for using the repository and pipeline in your own solution
Installation
You could create a custom app with some sort of database that will allow to store expired accounts and add a way to reactivate them by a Guest Inviter.
I chose to implement a combination of a SharePoint Online List and a Power Automate Flow to do exactly that.
Add SharePoint artifacts and permissions
- (optional) a new SharePoint Site containing all further assets
- but you could also use the Root site collection at https://[myclient].sharepoint.com
- a new SharePoint List called ‘Expired Guest User List’
- rename the ‘Title’ column to ‘User Principal Name’
- add a Choice column named ‘Reactivate ‘, options: ‘Yes’,’No’, default = ‘No’
- add a Single line of Text column named ‘Button’
- Configure the Button field with a CustomFormatter that will trigger the Power Automate Flow below as shown here
- a new Power Automate Flow called ‘Start Expired Guest User Reactivation’
- with a SharePoint Online ‘For a selected item’ trigger
- with an ‘Update Item’ action that will change the value of the ‘Reactivate’ column to ‘Yes’

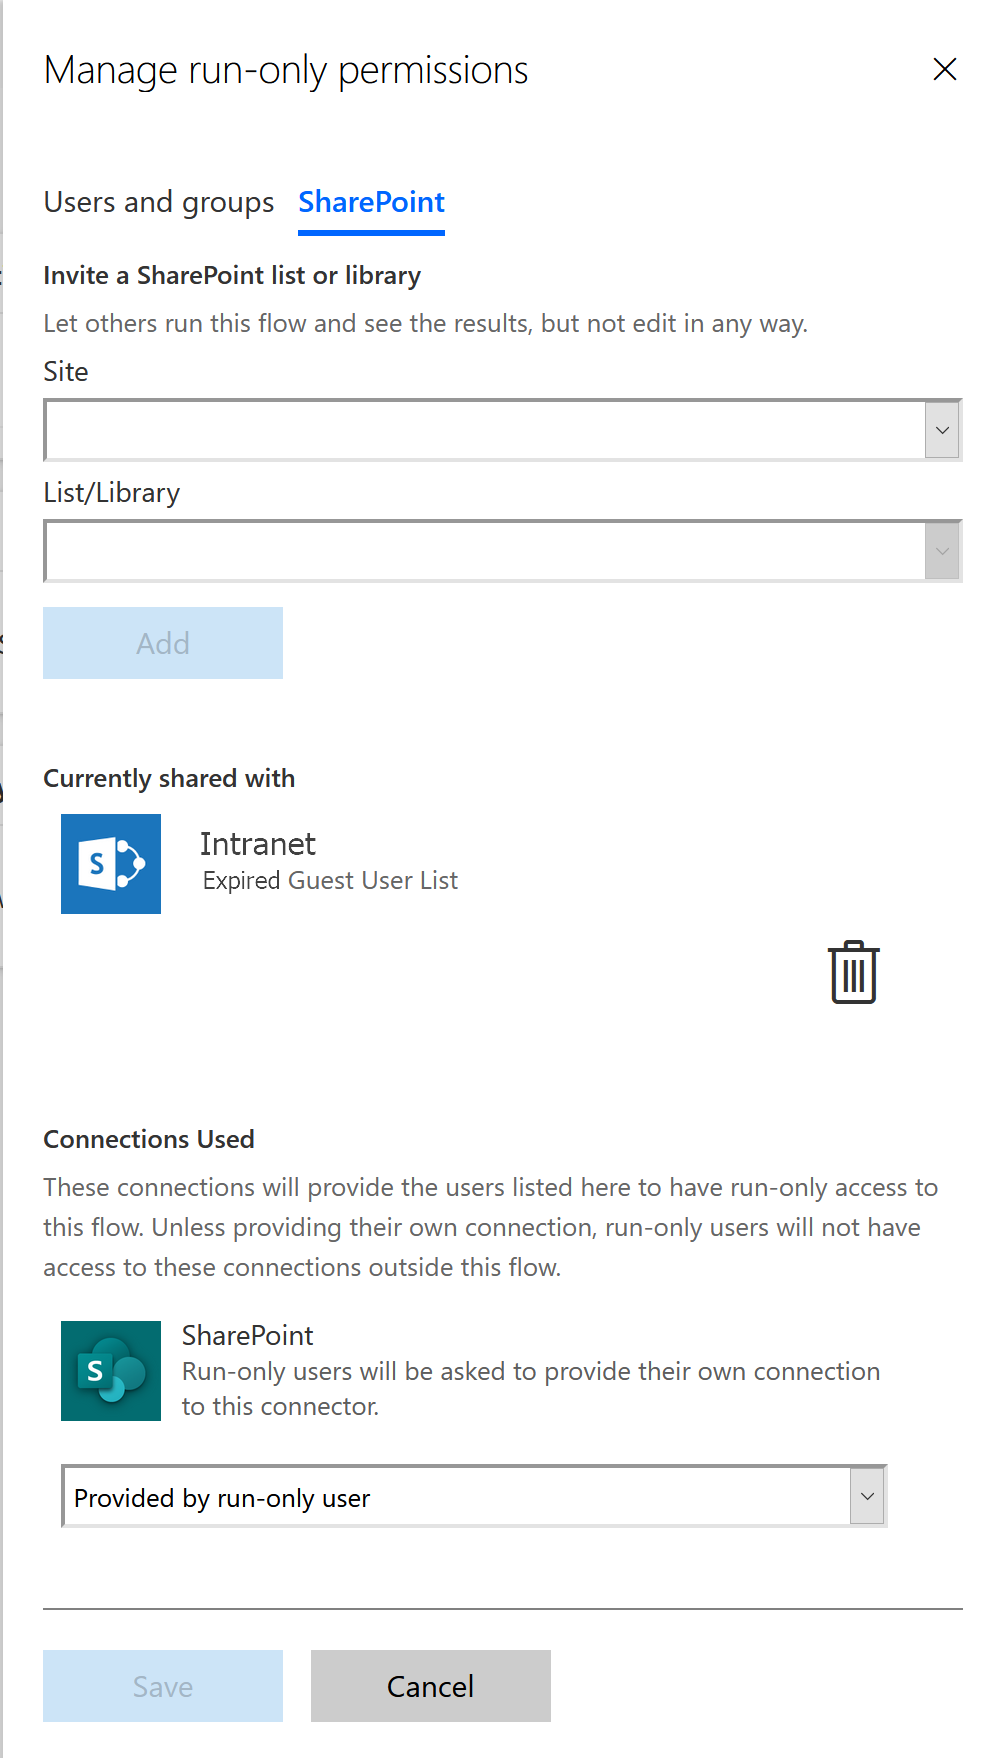
You have the means to set up security on both the Flow as the SharePoint List.
-
For the Flow I would recommend adding the SharePoint List itself as a run-only user. That way everybody with Access to the list can start a flow (but not edit the flow)
-
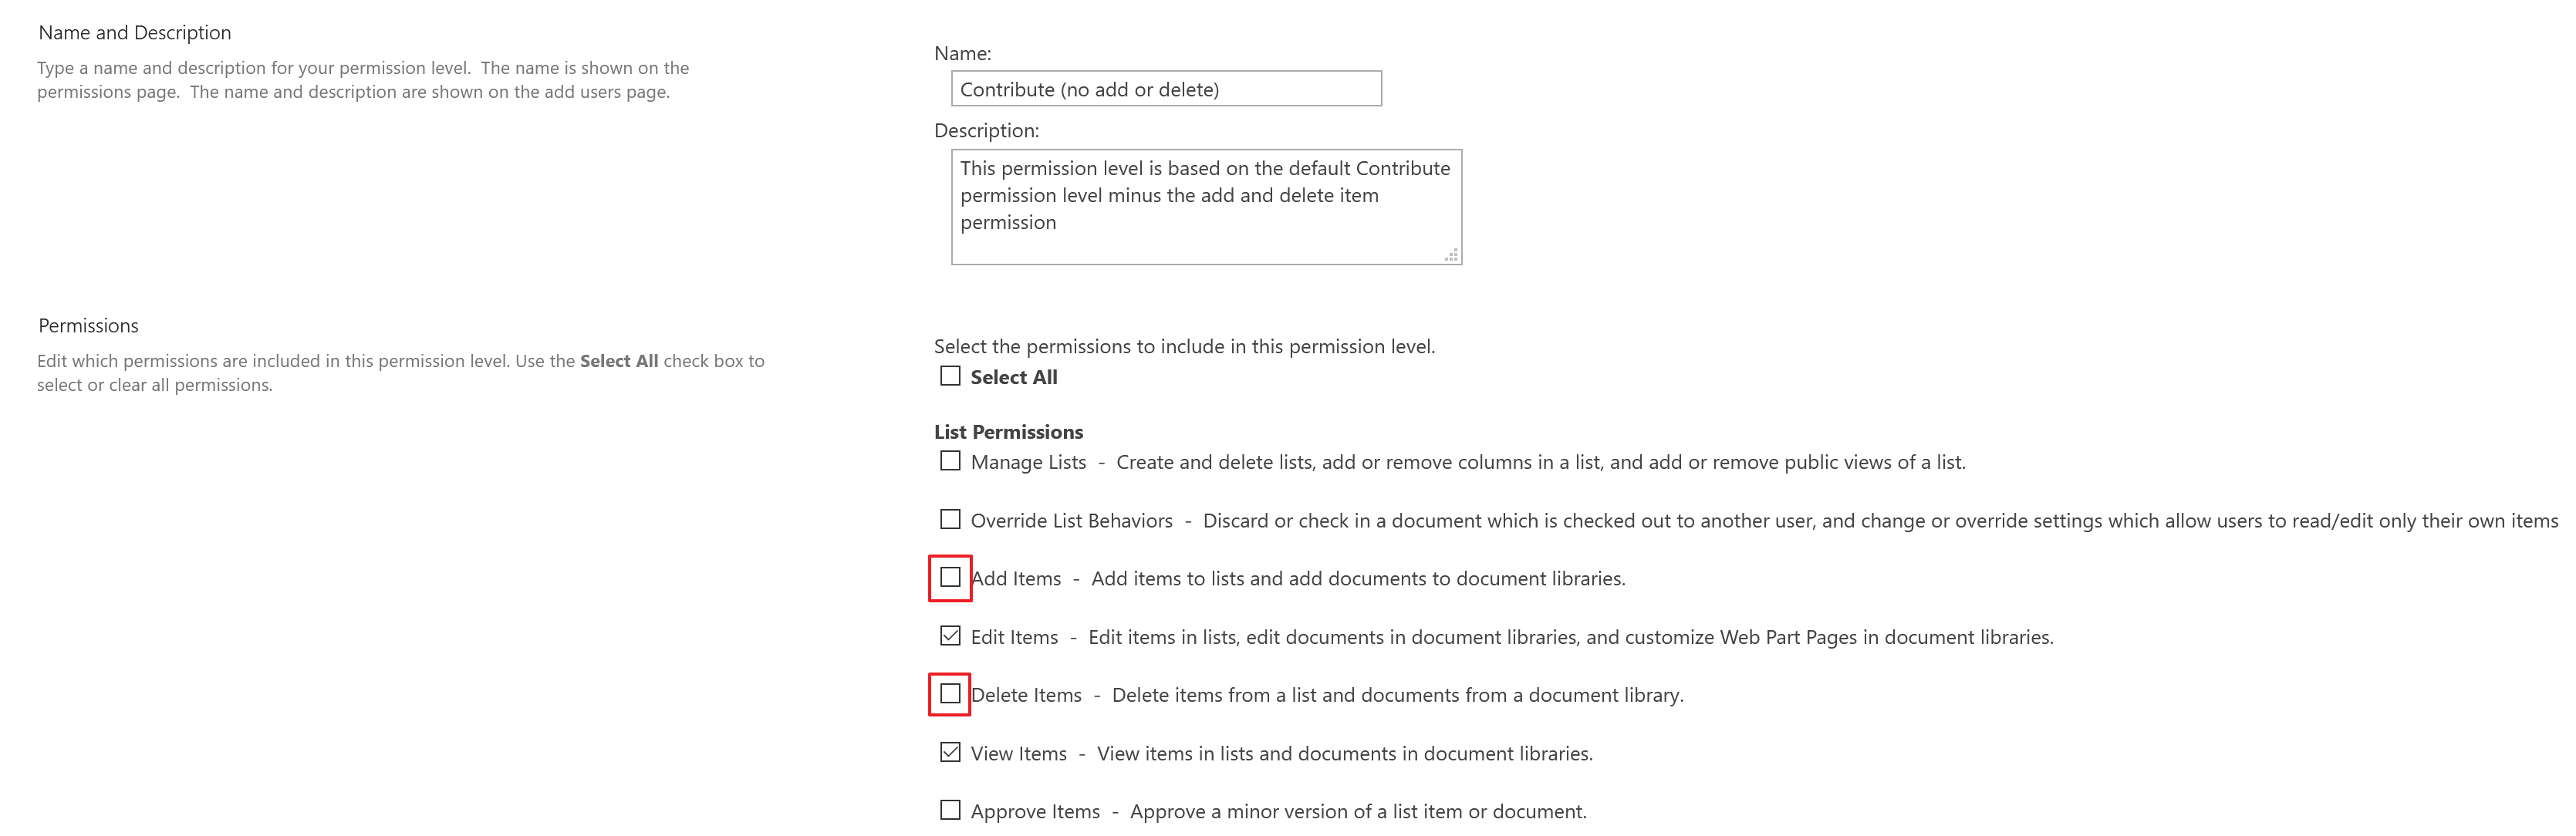
For the SharePoint List I would recommend the Guest Inviters have contribute access to the list but remove the ‘Add’ and ‘Delete’ permissions by creating a separate permission level for the site and apply it to a group assigned to the list.
Adjust Source Files
Update the 3 empty ‘placeholder’ functions in Scripts\M365\PnP-HelperFunctions.ps1 to your liking so they will perform their function of fetching and manipulating items in the SharePoint List.
Add-GuestExpirationToSharePointList-> This function should add or update the main SharePoint list item for the provided UPNGet-GuestReactivationsFromSharePointList-> This function should return a collection of SharePoint List Items with all necessary UPN values contained in the Title column.Remove-GuestFromSharePointList-> This function should removed a list item for the provided UPN from the main SharePoint list
Tip: to connect to SharePoint-Online use the following built-in function call provided by the scaffold.
$global:siteUrlTarget = "$($global:jsonenvironmentMisc.tenantUrl)/sites/[yoursite]"
Connect-PnPSpo $global:ServiceConnectionMethod.PnPSpo
Execute Locally
If you followed instructions you should now be able to execute the script Apply-GuestUserLifeCycle.ps1 locally.
Add additional pipeline
The primary ‘Continuous Integration’ pipeline is probably already configured in your Azure DevOps configuration and it is required to have these correct steps configured.
- A scheduled YAML pipeline is available in the project root called
azure-pipelines-guestlifecyclemanagement.yml. - You can add this additional pipeline referencing the provided YAML file by following these steps.
- As a final step add another Pipeline Environment called ‘microsoft-365-GUML’.
Now the pipeline is ready to be executed.
Usage
Test the PROD stage (deploy_PROD)
- Manually kick off the pipeline (or wait for the next scheduled start)
- The ‘deploy_PROD’ stage will now commence where the important steps occur by means of the following extension actions:
- Check that the main script is correctly executed by reviewing the ‘Run Deploy Script’ step.
- If any errors occur, please try and fix them or create an issue in the repository mentioning ‘Guest User Life Cycle Management’. Review the Troubleshooting section for more information.
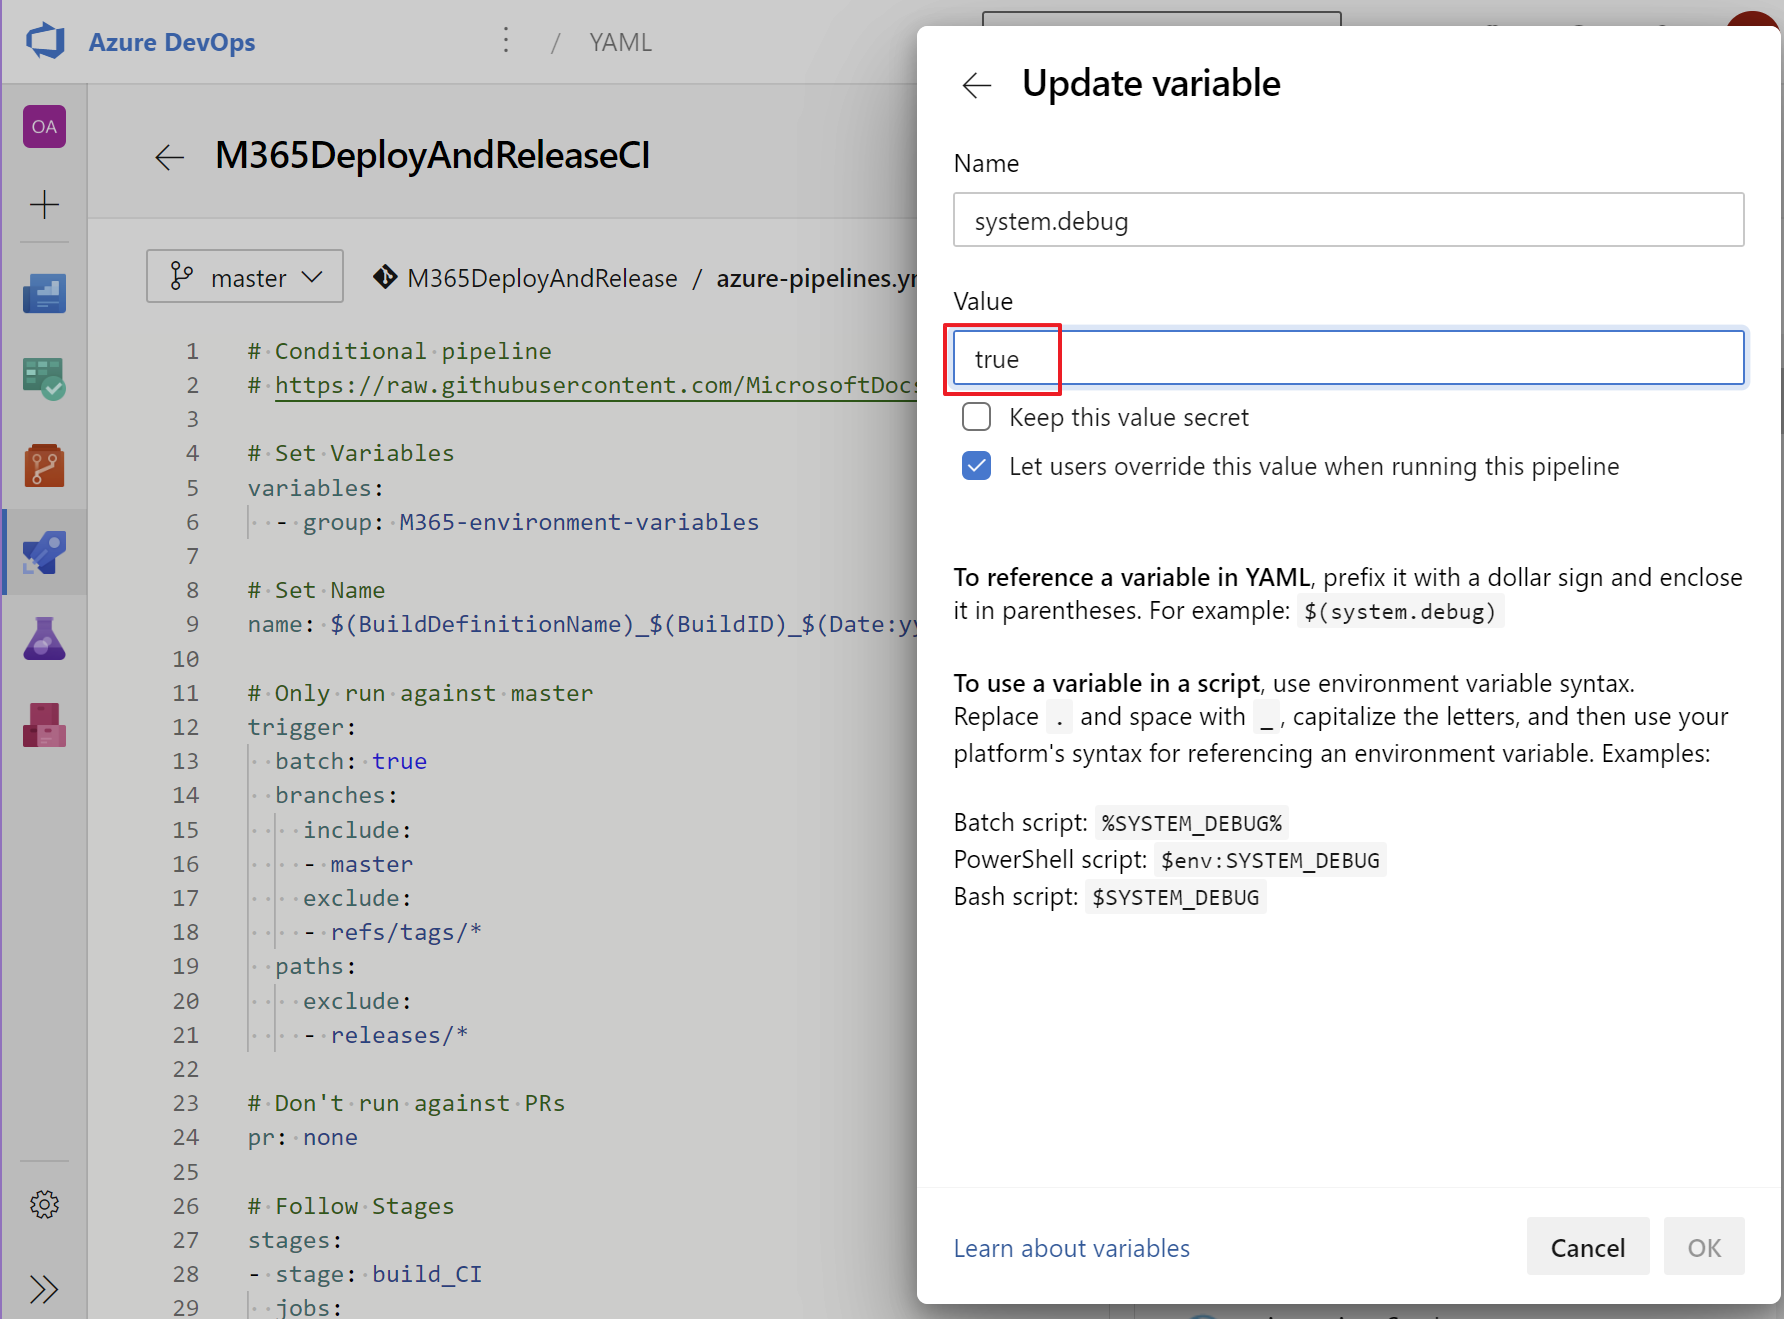
Troubleshooting
When you have issues with the the pipeline start troubleshooting by setting the System.debug variable in the pipeline to true and re-run the pipeline.
Results
You should now have a working scheduled pipeline running with the added bonus of a managed Guest User Life Cycle Management solution.
Recommendations
- Have Fun!