
Sharing is caring! Or taking your next step toward better SaaS Governance and External Identity Management for Microsoft 365 - Part 3 of 3
This is the third and final part of a three part blog series, building on the premise to open up your Microsoft 365 Cloud Service tenant to External Parties. This third part will describe the managing the life cycle of external identities making use of the ‘PaC Starter Kit’ I provided in part 2.
The first part described deciding on the level of ‘external sharing’ your organization cares to embrace.
The second part described how and when to manage settings related to ‘external sharing’ for your organization.
Welcoming various type of guests
Now Azure B2B ‘External Sharing’ policies have been established and settings have been applied through the pipeline and certain individuals in your organization have been given the ‘Guest Inviter’ Azure AD role it is time to get a grip on the external accounts that will be created.
In a ‘Azure B2B’ set up, each and every External (aka Guest) User is represented by an account in Azure AD. This is made visible by the ‘Source’ property in the Azure AD User blade as shown in the figure below.
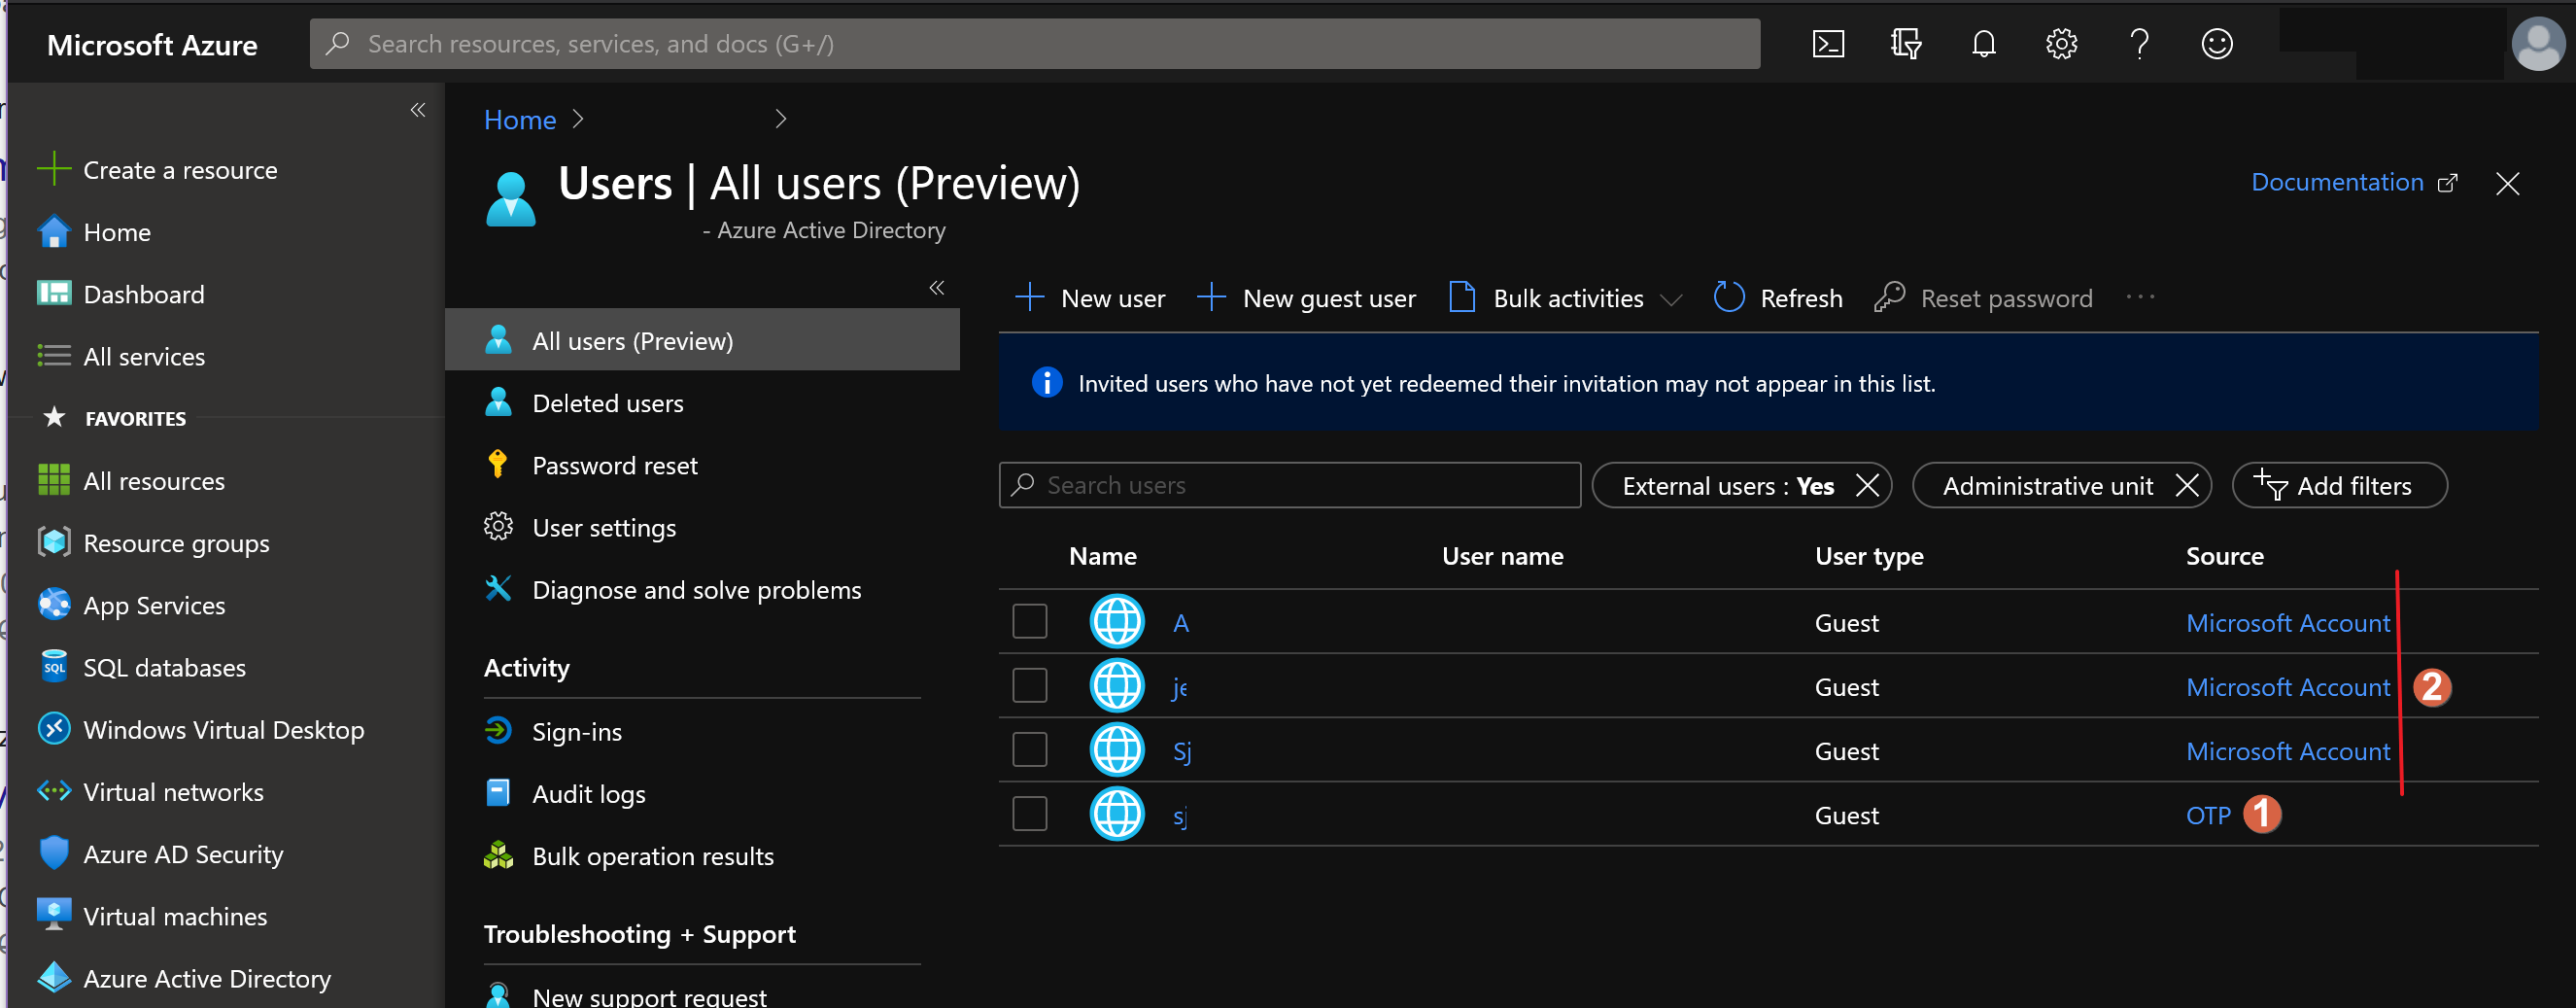 Figure 1: External Users (Guests) overview in Azure AD Users blade
You can expect these kind of Sources for your External Accounts:
- an ‘OTP’ (i.e. One-Time-Password) Account
- This type of account is created when no other established account source can be deduced1.
- a ‘Microsoft account’ (i.e. MSA) Account
- This type of account represents all personal accounts in use for accessing Microsoft services like OneDrive, Outlook.com and Skype
- an ‘Azure AD’ Account
- This type of account represents an organizational account in use for accessing Microsoft’s Work or School Office 365 tenants
- a ‘Google federation’ Account
- This type of account represents an optional account type in use for accessing Google Services. Additional configuration is required.
Note: Invited external users show up as ‘Invited user’ under Source. But not in any filtered view which is not a very nice experience but it will have to do.
From start to finish
Each external user account object typically goes though several common stages separated by specific time intervals.
- Creation
- Activation
- Expiration
- Reactivating
- Deletion
 User life cycle management process") Figure 2: External (Guest) User life cycle management process
Figure 2: External (Guest) User life cycle management process
Since we leave the ‘Creation’ phase entirely up to our resident Guest Inviters we will need to make arrangements for the other stages.
Establishing a ‘recurring automation’ for this purpose is probably a very good idea. We could have this process run every day and check for accounts that need to ‘progress’ to a different stage.
The following procedure has been inspired by Tony Redmond over at Office 365 IT Pros. Thanks for your continued insight! Additionally I have been following the discussion if it is preferable to expire external accounts based on activity or just by the age of the account. I came to the conclusion it would still be preferable to accommodate the latter because in my view it is always better to have an active review of external accounts, because detecting activity does not mean that anybody is expecting activity from the external account. Better be safe than sorry.
To make this process as readable as possible I have omitted service connection statements, logging and error handling. Presenting you with the core of the solution in this blog. Later on I will direct you to the GitHub location were you can download the entire script.
The first thing we do is declare some basic settings on activation of the external account…
1
2
3
4
5
6
7
8
# Set Variables Processing
$Today = (Get-Date)
$StaleAgeInDays = 180 # when should an External Account expire
$DeleteAgeInDays = 360 # when should an External Account be deleted, when not Reactivated. should be greater than StaleAgeInDays

# Set Variables SharePoint
$ProvisioningUrl = "https://[myclient].sharepoint.com"
$ProvisioningListName = "Expired Guest User List"
…and fetch any recent user additions by means of the Exchange Online AuditLog…
1
2
3
4
5
6
7
8
9
10
11
12
13
14
15
# Fetch any recent user additions
$EndDate = (Get-Date).AddDays(1)
$StartDate = (Get-Date).AddDays(-90)
$Records = (Search-UnifiedAuditLog -StartDate $StartDate -EndDate $EndDate -Operations "Add User" -ResultSize 2000 -Formatted)
$ToBeProcessed = @()
ForEach ($Rec in $Records) {
  $AuditData = ConvertFrom-Json $Rec.Auditdata
  # Only process the additions of guest users to groups
  If ($AuditData.ObjectId -Like "*#EXT#*") {
    # Do not add duplicate guests
    if ($ToBeProcessed.Guest -notcontains $AuditData.ObjectId) {
      $ToBeProcessed += @{Guest = $AuditData.ObjectId; Actor = $AuditData.UserId; Created = (Get-Date $AuditData.CreationTime)}
    }
  }
}
…then fill in the Owner value (based on the audit data) and not already present in a free CustomAttribute field on the External User object that is available on all Exchange Online objects. This will typically happen the first day the account was created.
1
2
3
4
5
6
7
# Add Owner to CustomAttribute1
ForEach ($Object in $ToBeProcessed) {
  if (!(Get-MailUser $Object.Guest).CustomAttribute14) {
    Write-Host "Setting '$($Object.Actor)' as owner for guest '$($Object.Guest)'"
    Set-MailUser -Identity $Object.Guest -CustomAttribute14 $Object.Actor
  }
}
For the expiration stage we either expire the account by disabling it OR set the expiration date in the objects CustomAttribute2 property, if no such date was set before.
1
2
3
4
5
6
7
8
9
10
11
12
13
14
15
16
17
18
19
20
21
22
23
24
25
26
27
28
# Expire accounts or set expiration date in CustomAttribute2
$GuestUsersEXO = Get-User -RecipientTypeDetails GuestMailUser -ResultSize Unlimited | Where-Object { !$_.AccountDisabled }
foreach ($GuestUser in $GuestUsersEXO) {
  $MailUser = Get-MailUser -Identity $GuestUser.UserPrincipalName
  $Owner = $MailUser.CustomAttribute14
  $ExpirationDate = $MailUser.CustomAttribute15
  if ($ExpirationDate) {
    if ($Today -ge (Get-Date $ExpirationDate)) {
      #Expire existing accounts with current date is greater than expiration date
      Write-Host "Disabling guest '$($GuestUser.UserPrincipalName)'"
      Set-AzureADUser -ObjectId $GuestUser.UserPrincipalName -AccountEnabled $false
      #Write disabled account to sharepoint list
      Write-Host "Add expired guest '$($GuestUser.UserPrincipalName)' to SharePoint List"
      Add-GuestExpirationToSharePointList $GuestUser.UserPrincipalName
      #Send email to owner and admin
      $Subject = "External User $($GuestUser.UserPrincipalName) has expired"
      $Body = "The account for External User $($GuestUser.UserPrincipalName) with Owner: '$($Owner)' has expired, by mandatory automatic expiration process. If you wish to reactivate this account go to the 'Expired Guest User List' and click the Reactivate button."
      Write-Host "Sending email to owner $($Owner)"
      Send-Report $Owner $Subject $Body
    }
  }
  else {
    $ExpirationDate = $Today.AddDays($StaleAgeInDays).toString('u')
    #Add expiration date (currentdate + stale age) to new accounts
    Write-Host "Setting '$ExpirationDate' as expiration date for guest '$($GuestUser.UserPrincipalName)'"
    Set-MailUser -Identity $GuestUser.UserPrincipalName -CustomAttribute15 $ExpirationDate
  }
}
I use a function Add-GuestExpirationToSharePointList to write the expired account to a SharePoint list. All that’s needed is writing the User Principal Name of the Guest Account to the lists Title column (check for duplicates!) and then provide a method for users accessing this list of setting this account to ‘Reactivate’. I use a Flow ‘Button’ to alter a field on the list item, but you could also just use a choice column which you can manually alter to a different text choice. Make sure the Guest Inviters have contribute access to this list but remove the ‘Add’ and ‘Delete’ roles. I also use the Send-Report function to send an email to the Owner (and a secondary Admin account, in case the Owner is not employed anymore).
Read more about this SharePoint List, its recommended permissions, the Flow button and the Send-Report function in the Guest User Life Cycle Management Tool recommendation on my GitHub ‘CaCAzureDevOpsPipeline’ Project. This will also include detailed instructions on having these parts in place to complete true life cycle management functionality.
Now it time to process Reactivations…
1
2
3
4
5
6
7
8
9
10
11
# Reactivate Guest User Accounts
$Upns = Get-GuestReactivationsFromSharePointList
foreach ($Upn in $Upns) {
  #Reactivate previously expired account
  Set-AzureADUser -ObjectId $Upn -AccountEnabled $true
  #Set new expiration date
  $ExpirationDate = $Today.AddDays($StaleAgeInDays).toString('u')
  Set-MailUser -Identity $Upn -CustomAttribute15 $ExpirationDate
  #remove reactivated account from sharepoint list
  Remove-GuestFromSharePointList $Upn
}
Here I use a function Get-GuestReactivationsFromSharePointList to fetch all User Principal Names of the Guest Accounts that someone with permissions to the SharePoint List has meant to reactivate. So there needs to be some field that has its value actively altered by a Flow, Guest Inviter or other Admin. Additionally I use a function Remove-GuestFromSharePointList to remove the list item after it has been processed.
Finally we process accounts that have not been reactivated in the period between the expiration date and the proposed deletion date and actually delete them from the organizational directory.
1
2
3
4
5
6
7
8
9
10
11
# Delete Guest User Accounts
[int]$StaleDeleteDifference = $DeleteAgeInDays - $StaleAgeInDays
$GuestUsersEXO = Get-User -RecipientTypeDetails GuestMailUser -ResultSize Unlimited | Where-Object { $_.AccountDisabled }
foreach ($GuestUser in $GuestUsersEXO) {
  if ($Today -ge (Get-Date ((Get-MailUser $GuestUser.UserPrincipalName).CustomAttribute14)).addDays($StaleDeleteDifference)) {
    #Remove account when current date is greater than expiration date + (deletion age - stale age)
    Remove-MailUser -Identity $GuestUser.UserPrincipalName -Confirm:$false
    #Remove SharePoint list item, if exists
    Remove-GuestFromSharePointList $Upn
  }
}
I use a function Remove-GuestFromSharePointList to remove the list item because it will not be processed anymore.
Wrapping and running it
These operations can all be put in a single PowerShell script and have it run on a schedule. You could have an old fashioned Scheduled Task on a Windows machine, use an Azure Function, a Logic App or even a Power Automate Flow but I really want to show you the option of having a scheduled pipeline in Azure DevOps directly running from the source file.
Next to the original Continuous Integration YAML pipeline we already set up in part 2 of this blog, it is very easy to add another one, but this time without the trigger. This additional YAML pipeline will make use of a schedule.
The key thing here is to disable all triggers and to put the schedule in place like so:
1
2
3
4
5
6
7
8
9
10
11
12
13
14
15
# Don't run against master
trigger: none

# Don't run against PRs
pr: none

# Run from schedule
schedules:
- cron: "0 8 * * Mon-Fri"
  displayName: M-F 8:00 AM (UTC)
  branches:
    include:
    - master
    exclude:
    - refs/tags/*
If you are interested in the full script for Guest User Life Cycle Management and a working YAML pipeline, have a look at the Guest User Life Cycle Management Tool recommendation in my GitHub ‘CaCAzureDevOpsPipeline’ Project featuring a Configuration-as-Code scaffold holding a Microsoft 365 SaaS Configuration with a basic multi-stage conditional YAML pipeline. This repository comes with instructions and the Guest User Life Cycle Management Tool comes with its own set of instructions.
-
I.e. consumer email addresses provided by ISPs like @aol.com, @yahoo.com will be known as OTP accounts in Azure AD. ↩